Assignments – Assigning Applicants to Score Sheets and Reviewers
Assignments are where you will assign the selected task(s) to be completed by your review committee(s) or group(s) and then also select the applicant’s that they will be reviewing for that task(s).
Tasks can be assigned on a Committee/Group level or assigned to a committee or group based on the specific funds they are reviewing.
Exercise 1
- Step 1: While in the Home > Select Application Form > Manage Applications > Select Assignments to Committees on the dashboard for your application.
- Step 2: The Assignments page will open:
-
Step 3: Select Task Name: Select the Task that you are wanting to assign the committee and applicants too. Click on the dropdown arrow to view the listing of your active tasks.
Note: For a task to appear it must have the Display on Review Reports selected in the task’s setup. - Step 4: Select Status: This will filter and display only applicants set to the Status you select. If you only want applicants that are set to specific Status to be displayed, select the current status of those applicants.
If you leave this selection as All, then all the applicants will display the exception of those that are in pending submission or withdrawn.
Use the Submitted Status and Request Pending with caution, as if selected it will only pull those applicants that show a status of “Submitted” or “Request Pending”. Once an applicant is assigned to “any” tasks or to another committee, they are automatically moved to a status of “Under Committee Review”. Therefore, if you are assigning applicants that may be assigned in other tasks or to other committees, then you are probably better to leave this field as All.
For Example:
You have committees that review based on the individual funding source. You select the task for that funding source and then display the applicants that meet the qualifications for that funding source. Once those applicants have been assigned, they are now automatically moved to a status of “Under Committee Review”. That same applicant may be eligible for additional funding sources that are part of this application process, therefore, when you go to assign a committee to that additional funding source’s task, that applicant will not appear if you filter for only the “Submitted” or “Request Pending” applicants, as they have already been moved to the “Under Committee Review” status due to the prior assignment.
- Step 5: Select Status Details: This will filter and display only applicants set to the Status Detail you select. If you only want applicants that are set to specific Status Detail to be displayed, select the current status detail of those applicants. This is usually set to All unless you have filtered out applicants in a different review process step and have set a Status Detail on your applicants so that you know who was qualified to move on and who wasn’t qualified to the next review level, then you can use this Status Detail filter to filter only those applicants that have qualified by selecting the Status Detail you created to track those applicants on that step.
Remember, these are custom stages and applicants are only moved to a Status Detail manually, this is not automatic. - Step 6: Filter By - You can create Custom Filters or Filter By a specific funding source to display only those applicants that meet the custom filter criteria you select, or that are matched to a specific funding source.
Custom filters: will allow you to filter by a question that is present in your application. For example: if you only wanted a Reviewer to review Female Applicants. You could create a custom filter to fetch only Female Applicants. Once you create the filter click on the Display Applicants button. You can add as many filters as you want.
Filter By Scholarships (funding source) if you have one too many application processes, and are using the Matching Funds Eligibility and Manage Funds functionality to match applicants to specific funds, you can filter on the fund to display only the applicants that have been matched to those funding sources. When filtering by Scholarship (funding source) a Dropdown Menu will appear with the list of funds that have been assigned to that application. Select only the fund(s) that will be reviewed using the task you selected and select only the committee that will be reviewing that specific fund.
If you have multiple funding sources, that are assigned using the same tasks, and have the same committees reviewing those funds, you can select all the funds at one time that they will be reviewing. Then all the applicants that matched all the funds will be displayed. This will keep you from having the same applicants appearing multiple times to that same review committee if they are using the same task to review them and the scores will not be different based on each fund. They will only need to review them one time for that one task.


- Step 7: Before clicking on the Display Applicants button you will want to determine what applicants are to be displayed for that task. This is on a per-task basis, not a per committee, therefore if this same task is being used to assign applicants to other committees, you will want to make sure to select the appropriate display option.
Show Un-Assigned Applicants – shows a listing of only the applicants, based on the filtering you set above, that have not been assigned to the selected Task. If they were assigned in this task but to a different committee, and you want to reassign applicants that may have been on that first assignment, then do not select this option, this will not display applicants if they have already been assigned to this task and therefore will not allow you to assign those same applicants to that second committee if needed.
Show Assigned Applicants– shows a listing of all the applicants that have been assigned to the selected task, based on the filtering you set above. Select, if you want only applicants to appear that have been assigned to this task already. This will not display any applicants that have not been assigned yet to this task.
Show All Applicants– shows a listing of all applicants that meet the filtering you set above. This will display applicants that have already been assigned for this task and all who have not yet been assigned to this task.
There are several scenarios to take into consideration before you begin to filter students.
1) 1:1 Application simply filter and assign to your committee.
2) 1:Many Application process - If you are assigning by funds, and applicants are eligible for multiple funds, you will need to filter by Show all Applicants if the same task is being used on the other funds with different committees.
- Step 8: After you have completed filtering and sorting applicants, Click the Display Applicants button, the applicant’s names will appear in the box on the left along with the total number of applicants that appears in the box.
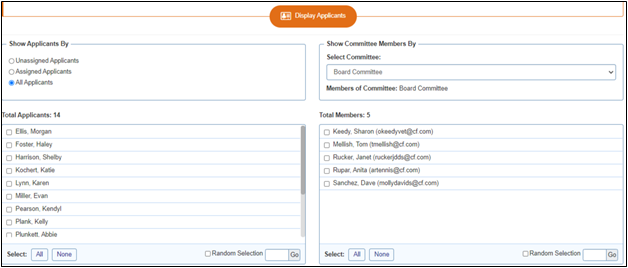
- Step 9: Select the Committee in the Select Committee drop down, that you will be assigning to these applicants. All the committee members and the number of members assigned to that committee will appear in the box to the left.
- All applicants get assigned to every committee member:
a. At the bottom of both boxes click on the Select All. A checkmark will be placed next to every applicant, and a checkmark will be placed next to every committee member. When you click the Save Assignment, every applicant will be assigned to every single committee member.
- If you only want to assign a few at a time to each committee member select only those applicants for that one committee member and then select only that one committee member. Click the Save Assignments for each batch.
- You don’t want every committee member to review every applicant but divide the applicants equally across the committee members so that each review an equal amount of applicants and the applicants are reviewed by an equal amount of reviewers. (I.e. three applicants to three committee members, but each applicant gets three reviews.)
a. You select the applicants on the left and then select only the reviewers on the right that you want to review that set of applicants, click the save assignments. Then repeat for the next batch, etc., selecting only those to be reviewed and only the committee members that will be reviewing.
- All applicants get assigned to every committee member:
You want to have the system randomly check the specific number of applicants and /or randomly select the specific number of committee members to assign those applicants to.
Select the box next to the Enable Random Selection at the bottom of the Applicant listing and enter the number of applicants you want to be assigned randomly in the blank select field next to the Go, and click Go. Do the same for the Committee Listing. The system will then automatically check that number of appllicants and /or check that number of committee members. Click the save Assignments and save that selection. Repeat for each batch
Note: Once you have assigned applicants to a committee member their Status will automatically be changed to “Under Committee Review”.
- Step 10: To assign, you will need to select the applicants on the left that you want to assign to the committee members on the right. Then click the Save Assignment in the middle to save that assignment. You can do the selection in multiple ways:
- Step 11: After the assignments have been completed, each assignment will appear in the listing at the bottom of the page. This will show the Task assigned, the applicant’s current Status and Status Detail, the Committee group, and the reviewer in that group who was assigned that applicant.
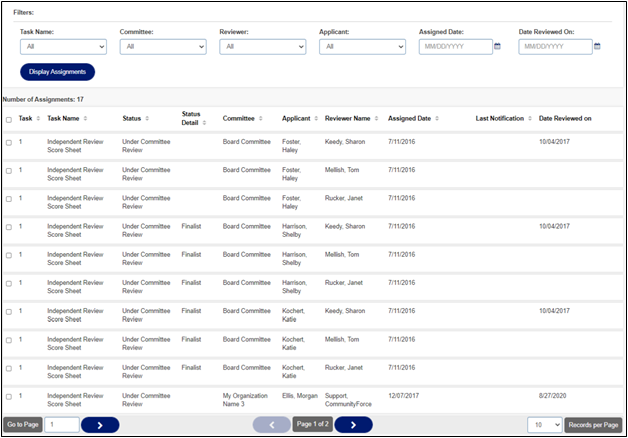
-
If you wish to change the view of the grid below you can Filter By:
Task Name
Committee
Reviewer
Applicant
Assigned Date
Date Reviewed On
Click on Display Assignments and the grid below will show applicants based on your filters. - The following workflow functions can be performed in the grid:
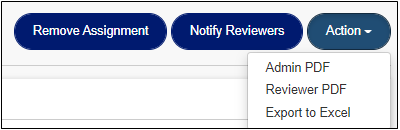
Remove Assignment – from the grid, you can remove an assignment from a reviewer
Notify Reviewers – customize an email template that will appear for you to send to your reviewers letting them know you have assigned applicants for them to review.
Action – Under action, we have the below list of
Admin PDF – generate an Admin PDF of an application(s)
Reviewer PDF – generate a Reviewer PDF of an application(s)
Export to Excel – export the grid to excel