Creating a Custom Email Template
Along with System Email templates, there is also the ability to create custom email templates for your application process. The following are ways this is helpful:
- You have emails you like to send out to users periodically that you would like to create for your application process.
- You have multiple request sections in your application and therefore need separate email templates for each section.
Exercise 1
- Step 1: Open the Notification Center.
- Step 2: Select the Application in the Select an Application that you want to add a custom email template too.
Note: if creating a custom template that applies to multiple applications, you will need to select each separate application and create the template separately in each
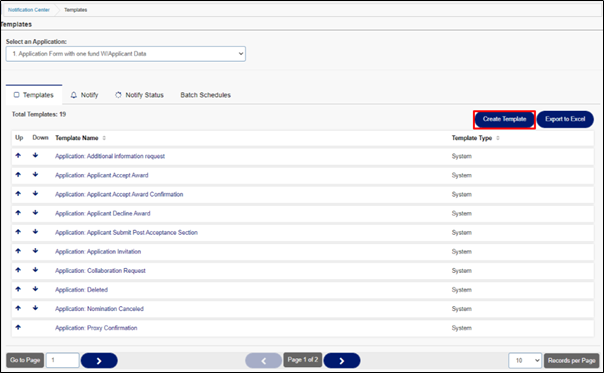
- Step 3: Once the Template listing appears for that application, click on the Create Template button. This button is located to the right of the listing header.

- Step 4: When you click on the Create Template button the following screen is displayed:
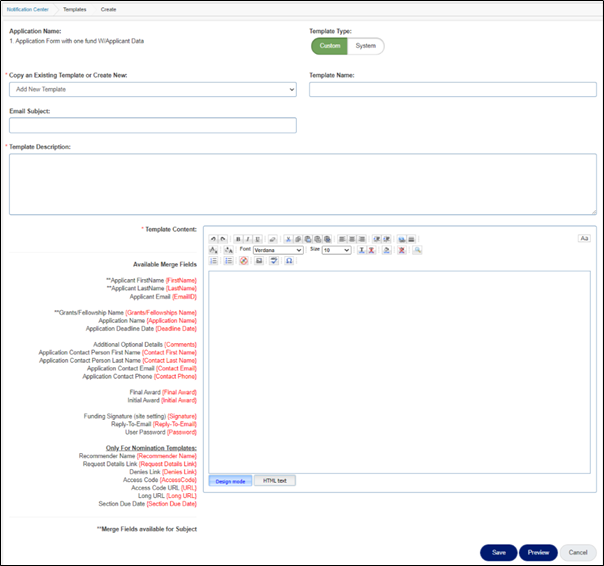
- Step 5: Template Type: Select Custom (Only custom templates can be created. System emails must be created by a CommunityForce developer and are hardcoded to a specific area within the application).
- Step 6: Copy an Existing Template or Create New: To create a New Template you will leave this blank. Once you do Step 7 and select the Add New Template in the Template Name field, you can return to this field and enter a name for your new template.
- Step 7: Template Name: Select Add a New Template from the dropdown to create a new template.
- Note if you are creating this template to be able to select it as the Section Email in a Request section, select the Add New Nomination Template instead.
- Step 8: Return to the “Copy an Existing Template or Create New” and enter the name of your new template. This is the name that will appear in the template listing when viewing the available templates for your application.
- Step 9: Template Description: Enter a description of the template’s purpose. This is viewable by staff only.
- Step 10: Email Subject: This is the subject line that appears in the recipient’s email. To add a subject line to your email, enter the Email Subject in this field.
- Step 11: Template Content: Enter the content for the email template. Content can be entered using either of the following tabs:
- Design Mode: The design mode editor works like using editing features in Microsoft Word. Type the information into the body of the editor as you would be typing and formatting it in a Microsoft Word document. You can also copy and paste the formatted text from other documents.
- HTML Text: You can create email templates using HTML tags by clicking on the HTML Text tab present beside the Design Mode tab. Enter the HTML tags with the content and it will display all the content as formatted.
- Step 12: Available Merge Fields for Custom generated templates: To the left of the editor’s box are Available Merge Fields that you can copy and paste into your email. Highlight the red Merge Field item only, being sure to include the {} on both sides of the item, right-click, copy and paste into the body of your email. (See the section: Using Merge Fields for a more detailed explanation of what each is mapping to in the site).
- These are auto-populated fields that the administrator can use when setting up an email template. When you send an email, these fields will automatically be populated with the desired data. For example, if the administrator chooses {FirstName}, it will automatically change to the applicant’s actual First Name, while sending a mail.
- Note: Use caution not to add extra spaces or delete any of the fields when copying it. Each template has certain Merge fields available in the field you are looking for is not listed in the column to the left, then it is not available for this specific template.
- Step 13: If creating a customized New Nomination Template for your request section(s) you have additional fields that you need to add to those templates to function properly. These items are listed under the “Only for Nomination Template section:
Note: If you only have one request section in your application form it is best practice to edit the default templates instead of creating a new Nomination template. Two standard nomination templates that are pre-loaded and available for use with your request section:
- Application: Request from Applicant. This is the System Default email template for your request sections.
- Application: Request for Signature. This is designed specifically for a Request Section that is being sent to capture a signature of a specific individual different from the applicant.
If creating a new nomination email template to be used in a Request Section (Nomination Template) below are a few things to consider:
Are you including the additional merge fields so that the recommended individual has all the items needed to effectively connect to that section?
If using more than one request section are their different email messages you want to need to send for each separate section. Do you need to create the templates for these?
Be sure to connect the correct template to the correct request section in the section setup.
- Step 14: Save: Click on the Save button after adding all the content to save the changes and go back to the Email Tools page.
- Preview: This allows you to see a layout preview of what the email will look like when sent. Note, the merge fields will not be populated when previewing.
- Cancel: Click on the Cancel button to go back to the Email Tools page and cancel any changes you have made.